
If you’ve ever been frustrated by your AR-10 misfiring or jamming while shooting it at the range, you likely overlooked one crucial step. It is necessary to clean your AR-10 or any firearm thoroughly after and after use. Failure to do so would almost certainly result in the misfiring or jamming described earlier.
Any seasoned firearms dealer will inform you that purchasing a high-quality, well-stocked gun complete AR-10 rifle cleaning kit is critical before firing your AR-10 for the first time. You’re asking for trouble if you don’t know how to clean your AR-10 rifle after you’ve fired it. When it comes to gun cleaning kits, there are many choices, but you’ll get the best results if you get one that’s specifically made for your gun’s style, build, and model.
Preparing To Clean Your AR-10
Preparing to clean your AR-10 gun starts with the following steps:
- Creating a fine, clean bench or area in which to clean
- Set up your cleaning supplies and equipment, as well as your cleaning kit.
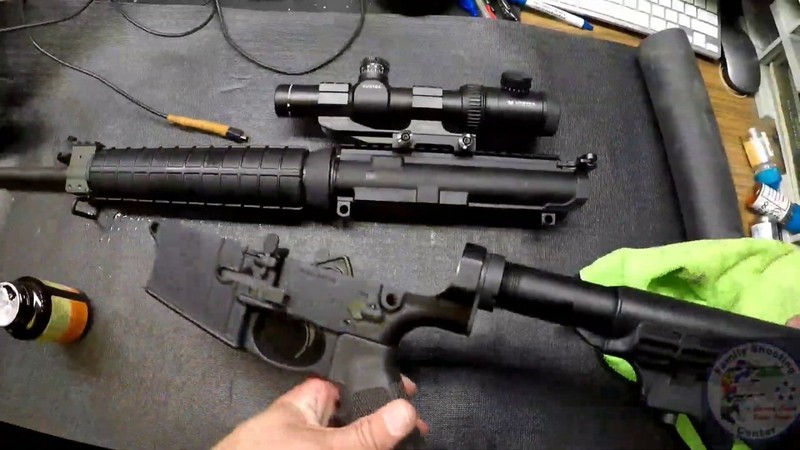
AR-10 Field Stripping and Cleaning Procedures
The cleaning procedures are as follows:
- Make sure the magazine is out, and there are no rounds in the chamber. Check the barrel to see if there is something stuck in the breach or barrel.
- Push in on the Takedown pin with the rifle lying on its left side and turn the gun over. Pull the pin outward, and the lower portion of the pivot pin will dropdown.
- Pull the charging handle outward to release the bolt carrier group, remove it and set it aside before pulling the charging handle the rest of the way out and set it aside.
Disassembling and Cleaning Bolt Carrier
- Taking Out the Firing Pin By punching the pin directly out the other side of the carrier with a special tool, the pin can be retained.
- The Firing Pin will drop right out if you tap the Bolt Carrier on the bench. Next, cut the Carrier’s bolt. Assemble the bolt by turning it to the left, removing the retaining pin, and pulling the bolt out.
- Remove the extractor from the bolt by poking out the retaining pin with a punch tool and removing the extractor, which completes the disassembly of the Bolt Carrier.
- Clean all of the components of the Bolt Carrier with a clean microfiber fabric. You are using a strong gun cleaning solvent to remove all carbon build-ups on all of the parts. To ensure that you clean all of the parts without causing any harm, use a good polymer cleaning brush.
Lubricating And Reassembling
- Apply a generous amount of lubricant to the extractor and reinstall it on the bolt. Due to the spring tension, slightly pinch the extractor and push the retaining pin in place, making sure the pin is flush and does not stick out. Ensure that the firing pin and retaining pin are lubricated. Lubricate the Bolt Carrier Assembly’s entire exterior.
- Replace the Bolt in the Carrier, making sure the extract is facing outward and to the right. Replace the Bolt Retaining Pin and rotate it back to its locked position.
- Drop the firing pin into the Carrier’s interior. Install the Firing Pin Retaining Pin. Return the Firing Handle to its original position within the rifle’s upper section.
- Within, place the Bolt Carrier on top of the Firing Handle. Return the Bolt Carrier and Charging Handle to their original positions in the Upper and secure it.
- Put the upper and lower sections together and replace the pins, and your rifle is full. Slide the charging handle in and out several times to ensure that everything is moving smoothly.